Welcome to Moda Fabrics!
December 24: Poinsettia
December 24: Poinsettia
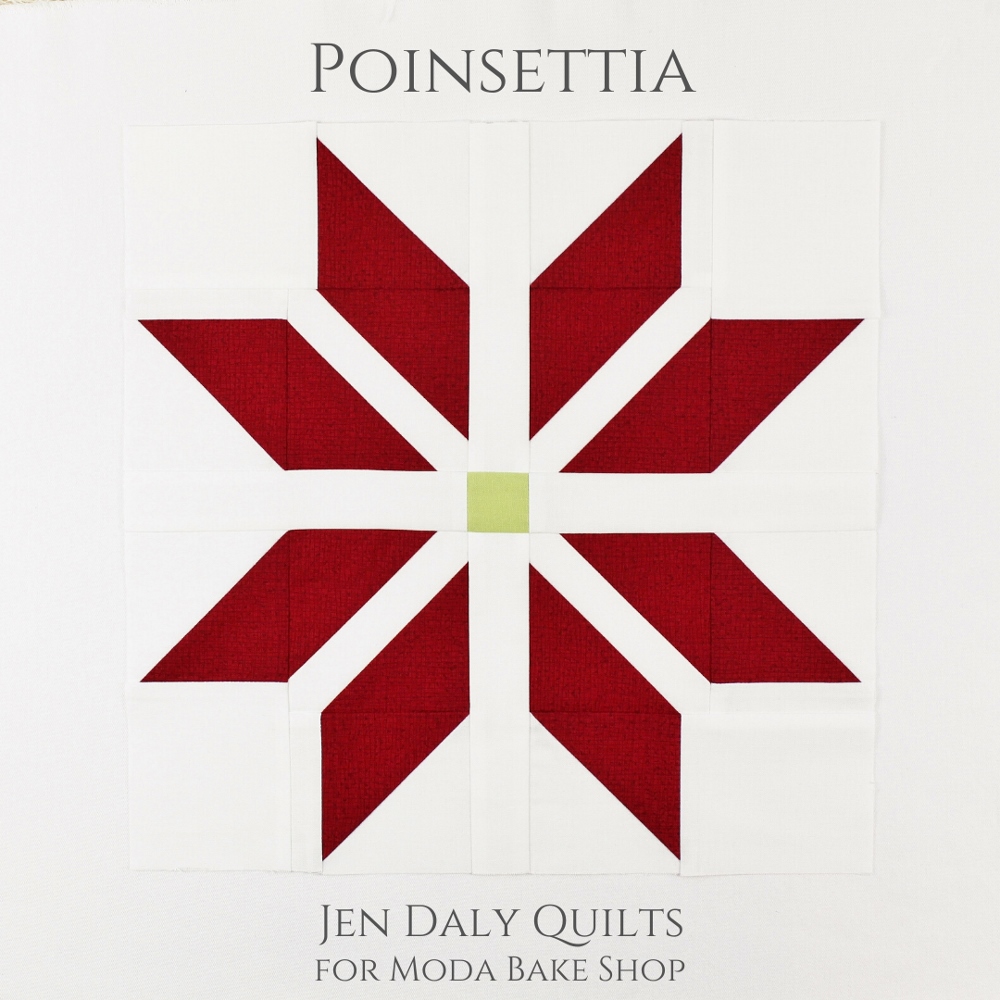
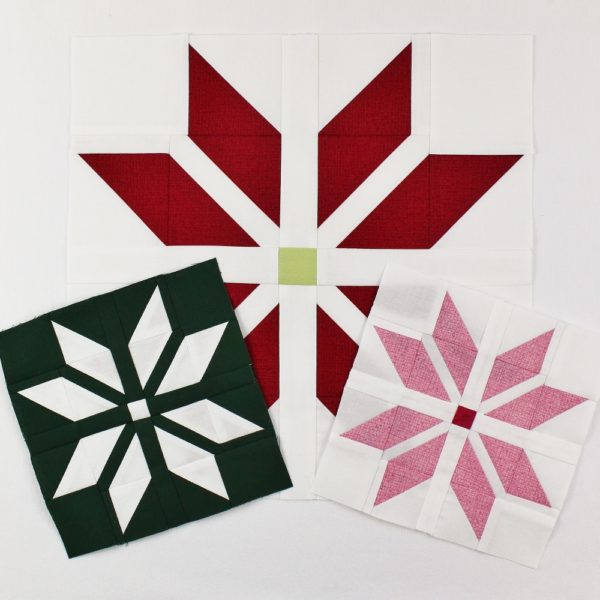
It's Christmas Eve and we're nearly there! Hi, I'm Jen Daly and I'm thrilled to be here today to share my "Poinsettia" block. I love this block because it's so simple and graphic. And it's also versatile—scroll to the bottom of the tutorial to see what happens when you reverse the background and print fabrics. Hint: it looks just like a snowflake!
This blocks finishes at 6" or 12" square.
![]()
| 6" Block | 12" Block |
|---|---|
| From white solid, cut: | From white solid, cut: |
| (1) 4½" x 4½" square | (1) 7" x 7" square |
| (4) 2" x 2" squares | (4) 3½" x 3½" squares |
| (4) 1¾" x 2" rectangles | (4) 3" x 3½" rectangles |
| (4) 1" x 3¼" rectangles | (4) 1½" x 6" rectangles |
| (4) ¾" x 1¾" rectangles | (4) 1" x 3" rectangles |
| From red print, cut: | From red print, cut: |
| (1) 4½" x 4½" square | (1) 7" x 7" square |
| (8) 1¾" x 1¾" squares | (8) 3" x 3" squares |
| From yellow-green solid, cut: | From yellow-green solid, cut: |
| (1) 1" x 1" square | (1) 1½" x 1½" square |
![]()
The following instructions are for the 12" block. The 6" block is made exactly the same way, but the 6" block patch sizes are listed in the brackets[].
Make Half-Square Triangles
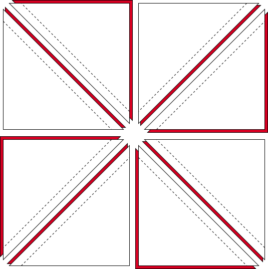
- On the wrong side of the white 7" square [4½" square], use a pencil to lightly draw two diagonal lines from corner to corner. Layer the marked white square atop the red print 7" square [4½" square] with right sides together.
2. Stitch the pair together a scant ¼" from either side of both drawn lines.
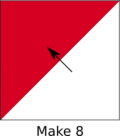
3. Cut the pair apart in half vertically and horizontally and along the drawn lines to make 8 Half-Square Triangles.
4. Press seam allowances toward the red and trim HSTs to measure 3" x 3" [1¾" x 1¾"] unfinished (including seam allowances).
Make Double Triangle Units
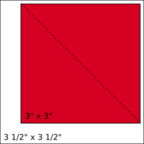
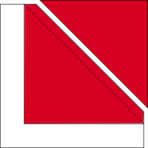
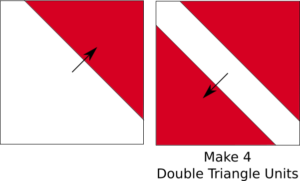
- On the wrong side of 8 red print 3" squares [1¾" squares], use a pencil to lightly draw a diagonal line from corner to corner. Layer a marked red 3" square [1¾" square] atop one corner of a white solid 3½" square [2" square] with right sides together as shown and stitch the pair together on the drawn line.
2. Trim seam allowance to ¼" and press toward the red.
3. Repeat steps 1 and 2 at the opposite corner of the white 3½" square [2" square], paying careful attention to the orientation of the stitching line. Repeat to make 4 double triangle units.
Make Quarter Petal Units
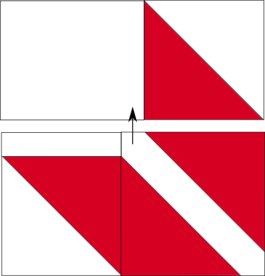
1. For one quarter petal unit, gather 2 HST units, 1 double triangle unit, 1 white solid 1" x 3" rectangle [¾" x 1¾" rectangle] and 1 white solid 3" x 3½" rectangle [1¾" x 2" rectangle].
2. Stitch together 1 HST unit and white 1" x 3" rectangle [¾" x 1¾" rectangle], paying careful attention to the orientation of the HST. Press seam allowances toward the white rectangle.
3. Stitch together the unit from step 2 and the double triangle unit, paying careful attention to the orientation of all seam lines. Press seam allowances toward the unit from step 2.
4. Stitch together remaining HST unit and white 3" x 3½" rectangle [1¾" x 2" rectangle], paying careful attention to the orientation of the HST. Press seam allowances toward the white rectangle.
5. Stitch together the units from step 3 and 4, paying careful attention to the orientation of all seam lines. Press seam allowances toward the unit from step 4 to make a quarter petal unit.
6. Repeat steps to make 4 quarter petal units.
Assemble Block:
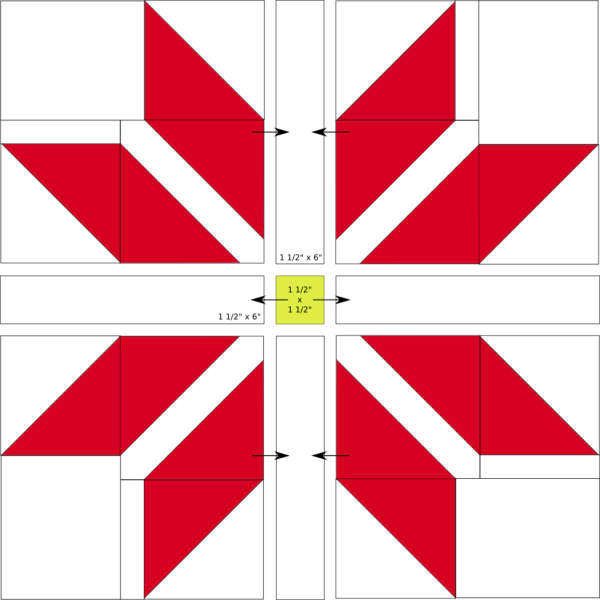
- Lay out 4 quarter petal units, 4 white solid 1½" x 6" rectangles [1" x 3¼" rectangles] and 1 yellow-green 1½" x 1½" square [1" x 1" square] in 3 horizontal rows as shown. Stitch together the pieces in each row, pressing the seam allowances toward the white rectangles.
2. Stitch together the rows. Press the seam allowances toward the middle row to finish the block.
![]()
One striking 6" or 12" Poinsettia (or snowflake :)) block!
Thank you so much for following along today!
Happy Holidays!
Jen Daly
{blog: JenDalyQuilts.com}
{instagram: /jendalyquilts}
{shop: Etsy.com/shop/JenDalyQuilts}
{facebook: /jendalyquilts}







Comments