Welcome to Moda!
December 18: Pile of Presents
December 18: Pile of Presents
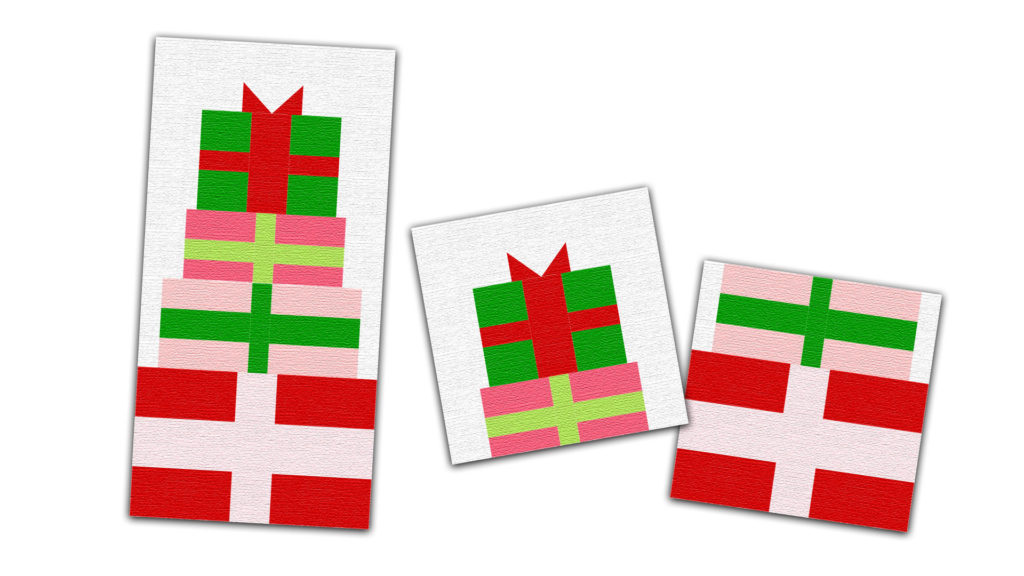
Today's block is another play on the gift theme! But there's a surprise with this block...
You can just make the top half and you will have a 12" block for your quilt. Add the optional bottom half and you fill up two 12" block spots in the quilt. Now this may not work depending on which setting you choose in the end...so keep that in mind. The blocks also work alone - applique a gift tag to the plain block to give it a bit of holiday flair.
These blocks finish at 12" square OR 12" x 24" when you pile them up!
![]()
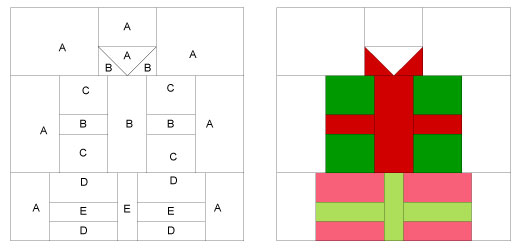
| Block 1 | |
|---|---|
| A - Background | (2) 4" x 5" (1) 2.5" x 3.5" (1) 1.5" x 3.5" (2) 3" x 5.5" (2) 2.5" x 4" |
| B - Red | (2) 1.5" squares (1) 2.5" x 5.5" (2) 1.5" x 3" |
| C - Dark green | (4) 2.5" x 3" |
| D - Dark pink | (2) 1.5" x 4" (2) 2 " x 4" |
| E - Light green | (3) 1.5" x 4" |
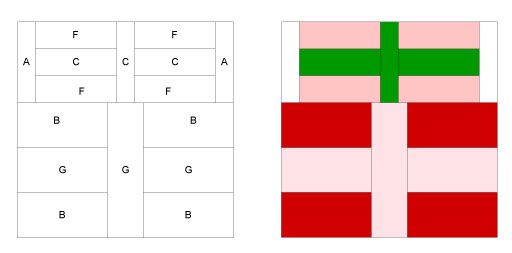
| Block 2 (optional) | |
|---|---|
| A - Background | (2) 1.5" x 5" |
| F - Medium pink | (4) 2" x 5" |
| C - Dark green | (2) 2" x 5" (1) 1.5" x 5" |
| B - Red | (4) 3" x 5.5" |
| G - Light pink | (2) 3" x 5.5" (1) 2.5" x 8" |
![]()
BLOCK 1
Make flying geese. Draw a pencil line on the wrong side of the diagonal of each red square. Match 1 square up the corner of background fabric rectangle. Sew on the marked line. Trim 1/4" away from seam and press. Repeat on opposite corner.

Create the top unit of the gift by joining the flying geese unit with the background pieces:
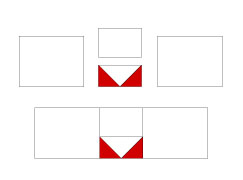
Create the body of gift #1 as shown:
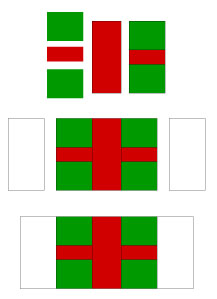
Create the body of gift #2 as shown. Note that the narrower pieces of the gift's main part are on the bottom of the block.
Combine all three units to complete Block 1:
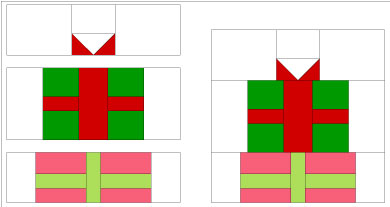
BLOCK 2 (OPTIONAL)
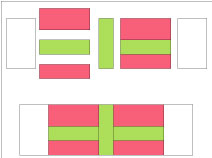
Block 2 assembly is very simple. Join the pieces for gift #3 and gift #4 as shown below.
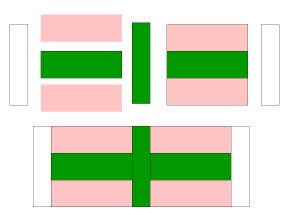
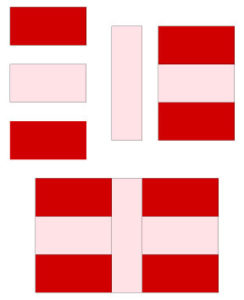
Join units to complete Block 2.
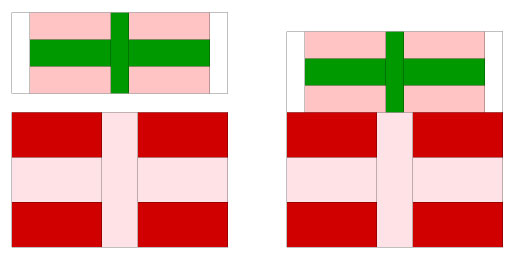
That's it! Your own pile of presents for under the tree.
![]()

Lisa Calle

Comments