Welcome to Moda Fabrics!
Ribbons and Bows Quilt
Ribbons and Bows Quilt
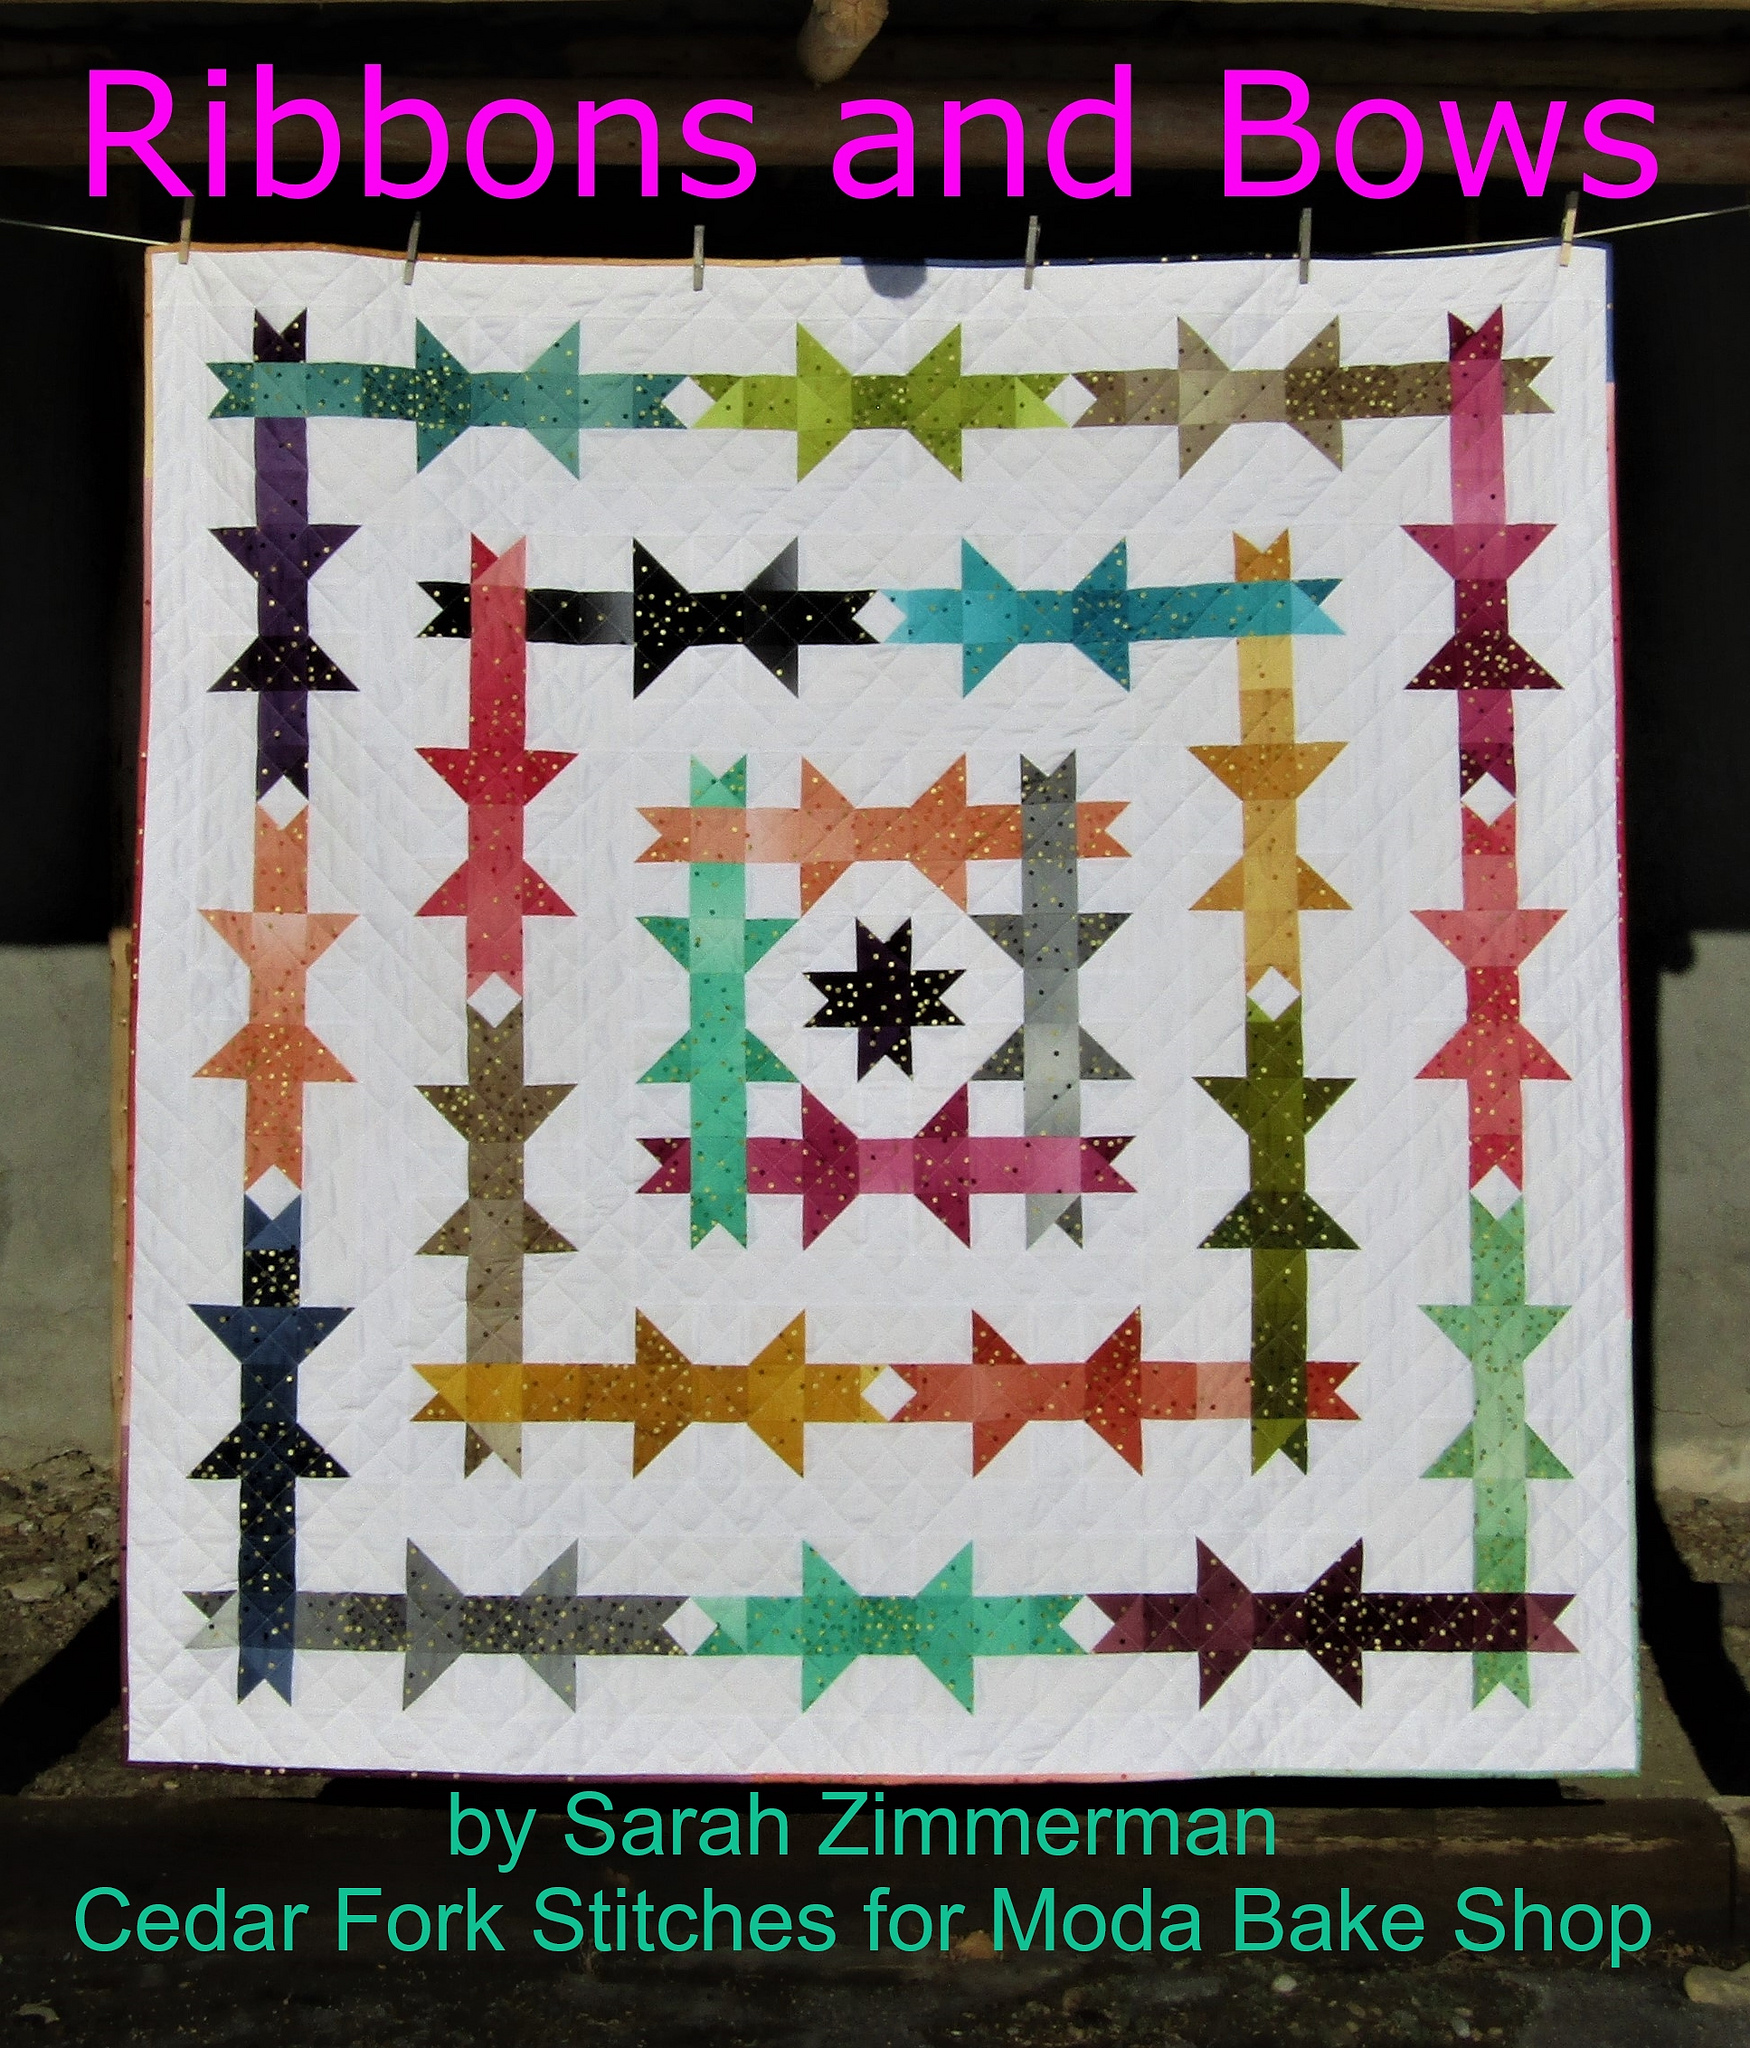
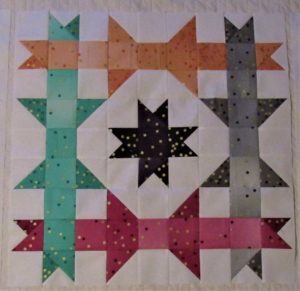
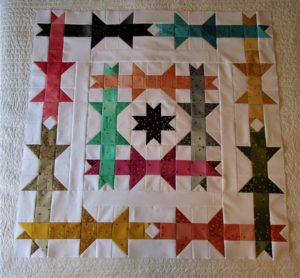
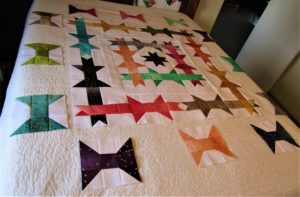
Ribbons and Bows is a quilt design inspired by all the pretty, fun, BIG bows that Mamas put on their baby girls! Finishing at 68"x 68", it is big enough that it can follow a little one to their big girl bed! The Ombre Confetti Metallic, by V. and Co., are the perfect glitzy-girly touch! Plaids, ginghams and stripes might turn this into a "Bow Tie" quilt for a little boy! One or more of the blocks could also be easily adapted to make a cute accessory pillow to go with it!
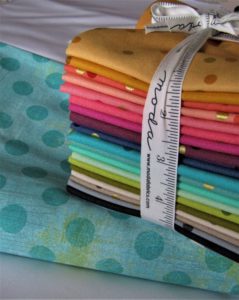
1 Fat Quarter Bundle Ombre Confetti Metallic, by V. and Co.
Background: 3 1/4 yd Bella Solids Bleached White (9900 98)
Backing: 2 yd Grunge Hits the Spot 108", "Pool" (11131 30)
Binding: pieced from FQ Bundle
While the construction of Ribbons and Bows requires simple piecing skills and techniques, the organization of the colors/fabrics/blocks is what kicks this design up a level in "difficulty". Please read through all the instructions carefully before proceeding. Width Of Fabric(WOF) is assumed 42". All seam allowances are 1/4".
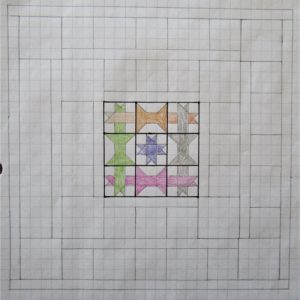
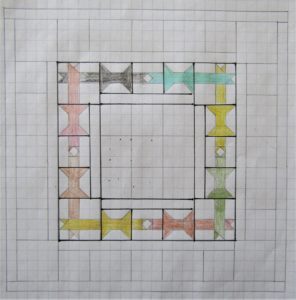
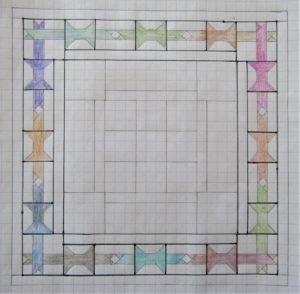
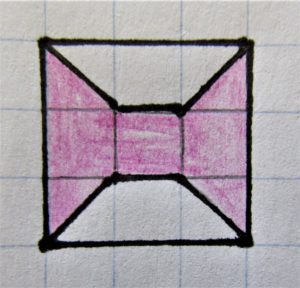
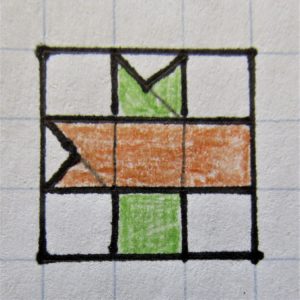
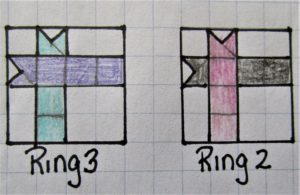
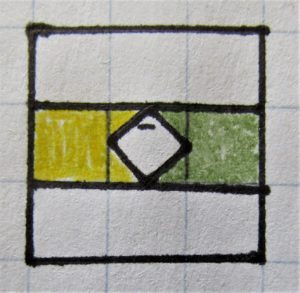
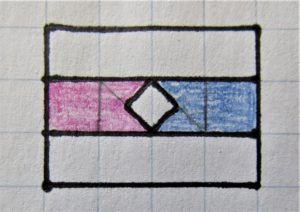
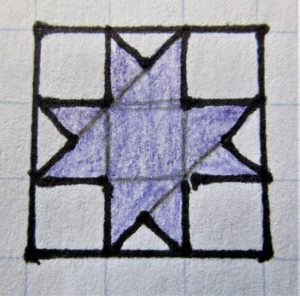
Before cutting any fabric, study the diagrams below to gain an understanding of this design and it's various blocks and "rings".
Rings:
Center and Ring 1:
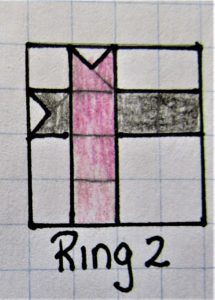
Ring 2:
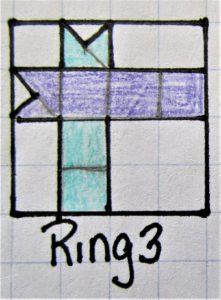
Ring 3:
All together:
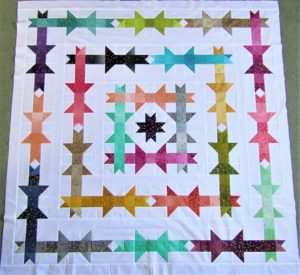
Blocks: by name, unfinished size and number of blocks required.
*There is no "Ribbon Block 1". The "Ribbon" blocks are numbered to match the Ring they are used in.
Cutting Instructions: background fabric
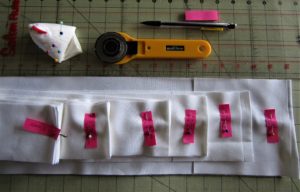
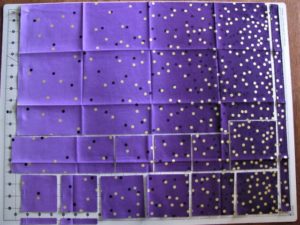
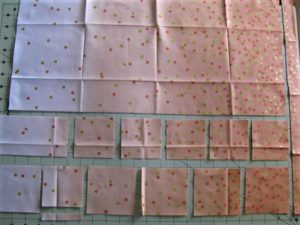
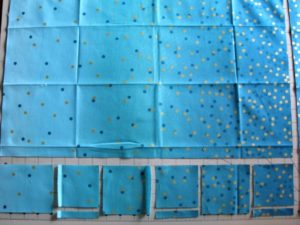
Tip: Label each stack of cut background pieces with the measurements for easy reference during block assembly.
I cut and labeled my strip sets, then subcut and labeled the resulting stacks. Apparently I never took a photo of the labeled stacks...but it is a must for easy reference while constructing the blocks!
From the background, Bella Bleached White, cut:
- 14 strips 3" x WOF. Set aside for borders.
- 6 strips 3" x WOF. Subcut each of 5 strips into 14 3" squares. Subcut 1 strip into 10 3" squares. For a total of 80 3" squares.
- 8 strips 3" x WOF. From 4 strips, subcut 4 10 1/2" x 3" rectangles. 16 total. From 2 strips, subcut 7 5 1/2" x 3" rectangles. From 1 strip, subcut 5 8" x 3" rectangles. From 1 strip, subcut 3 8" x 3" rectangles; and 2 5 1/2" x 3" rectangles. For a total of 16 5 1/2" x 3" rectangles, and 8 8" x 3" rectangles.
- 4 strips 3 1/2" x WOF. Subcut 12 3 1/2" squares from each strip for a total of 48 3 1/2" squares. Mark each of these squares with a diagonal line, for making HSTs.
- 2 strips 4" x WOF. Subcut each into 10 4" squares, for a total of 20 4" squares.
- 1 strip 5 1/2" x WOF. Subcut into 7 5 1/2" squares. Cut one more 5 1/2" square, for a total of 8 5 1/2" squares.
* * * * * * * * * * * * *
Cutting Instructions for Center and Bow Blocks:
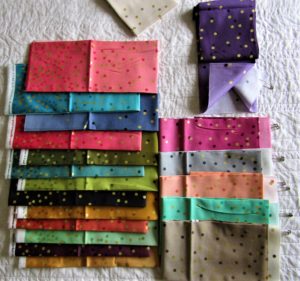
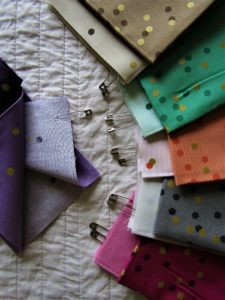
From the bundle of 20 Ombre Metallic Confetti fat quarters, I pulled out the lightest tan FQ and did not use it because of the low contrast with the white. From the remaining 19 FQs, pick 1 FQ for the Center Block. I chose the purple because I wanted one of the darker values in the center. The Center FQ will also be used for 1 Bow Block. Choose 5 more FQs that you want to use twice. I included two neutrals in this group, gray and light brown. Pin 2 safety pins in the corner of each of these 6 FQs to easily remember, while cutting, that these will have "double" the pieces cut from them.
*I used a single safety pin to mark the "Center" FQ.
Cut the "double" FQs first:
From the "Center" Fat Quarter, cut:
For the Center Block: 1 4" square, 2 3 1/2" squares, 1 3" square
For the Bow Block: 2 3 1/2" squares, 3 3" squares
After trimming off the selvedge, orient the FQ to cut along the longer side. After the top is assembled, we will come back and cut strips from some of the FQs for a scrappy binding, and we want to preserve the length for those.
From each of the 5 "Double" FQs, cut:
4 3 1/2" squares (for Half Square Triangles, HSTs), 6 3" squares.
* These are the pieces for the Bow Blocks only. We will come back and cut the Corner and Ribbon Blocks after the placement of each Bow Block has been determined.
From each of the remaining 13 FQs, cut:
2 3 1/2" squares (for HSTs), 3 3"squares.
Play with the ombre effect of these fabrics, to add variety to the intended placement of these pieces. The 3" squares will form the center "band" of the Bow Block, so you may want a dark, a medium, and a light value for at least some of the Bows.
* * * * * * * * * * * *
Each of the blocks in this design require a variety of "units". The following diagrams are instruction for each unit referred to in the block assembly instructions to follow.
Half Square Triangles/HSTs:
For use in Bow Blocks, and in Quarter Square Triangle units.
- Place a background and a print square right sides together. Mark a diagonal line, shown as the solid line, above.
- Sew 1/4" on either side of the marked line, shown as the dotted pencil lines, above.
- Cut on the solid line.
- Press seams open, and trim to size specified. For the Bow Blocks, begin with 3 1/2" squares, when finished, trim to 3". For the HSTs used to make the Quarter Square Triangle units, trim to 3 1/2".
Quarter Square Triangles/QSTs:
For use in Center Block, Corner Blocks 1 and 2, Ribbon Block 3.
- Using a 4" background and print square, make 2 HST units, trim to 3 1/2".
- Place 1 HST and 1 3 1/2" print square right sides together. Mark a diagonal line on the print square, and place it so the marked line is in the opposite direction as the diagonal seam of the HST, as shown above. 1 Hst + 1 print square=2 QST units.
- Sew 1/4" on either side of marked line, shown as dotted lines, above.
- Cut on the marked line.
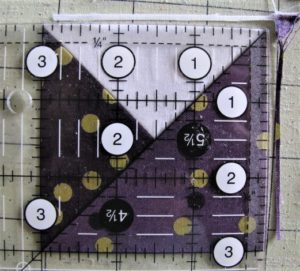
- Press to one side, and trim to 3". When trimming QSTs, be sure to align both the diagonal line on your ruler with the long seam, and the 1 1/2" mark along the diagonal, at the center seam of your unit.
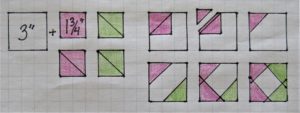
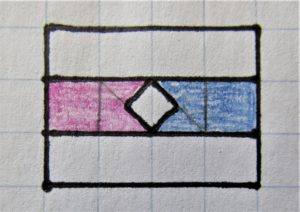
Square in a Square/SiaS: For use in Ribbon Block 2.
Each SiaS unit requires 1 white 3" square, and 4 print 1 3/4" squares, 2 each of 2 different prints, determined by placement of the Bow Blocks.
- Mark a diagonal line on each of the 4 print squares.
- Referring to diagram, place 1 small square, right sides together, in the corner of the white square.
- Stitch directly on the marked line, holding a needle width from the marked line (towards the corner).
- Cut 1/4" from the stitched line, toward the corner.
- Press towards the corner.
- In the opposite corner, place a different color print square, right sides together, on the white square.
- Stitch a needle width (toward the corner) from the marked line.
- Cut 1/4" from the stitched line, toward the corner.
- Press to the corner.
- Referring to the diagram, repeat for the remaining 2 corners.
- Maintaining 1/4" between the points of the inner white square and the edge of the unit, trim if needed, to 3".
* * * * * * * * * * * *
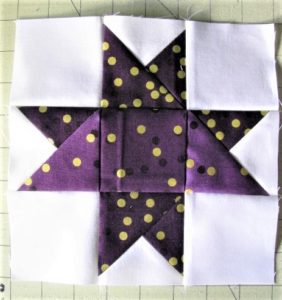
Center Block Instructions:
Make the Center Block first.
- Make 2 HSTs. Use 1 4" print square and 1 4" white square. Trim to 3 1/2".
- Make 4 QST units. Use the 2 HSTs and 2 3 1/2" print squares.
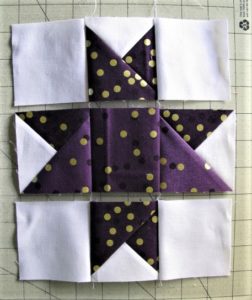
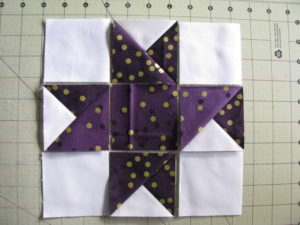
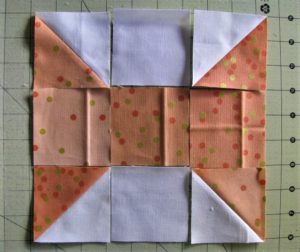
- Referring to the diagram at the beginning of this post, or the following photo, lay out the Center Block, using 4 white 3" squares, 1 print 3" square, and the 4 QST units.
- Sew each row together.
- Press the seams in the top and bottom rows in the same direction. Press the seams in the middle row the opposite direction.
*The orientation of the main diagonal seam in the QST units, in this and other blocks, is not of consequence to the overall design. If yours are different than shown, as long as the white triangles in the QST units are oriented the same, that is all that matters.
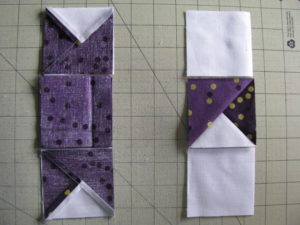
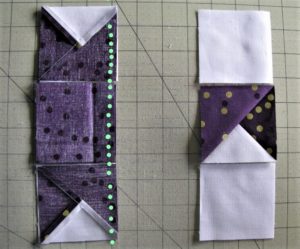
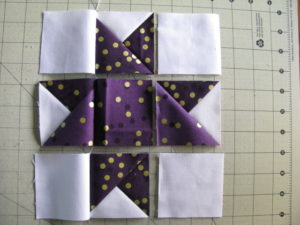
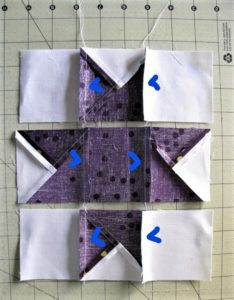
*Tip: These blocks lend themselves well to "chained row", or "web" piecing. Whereby, column 2 units are flipped over onto the corresponding units in column 1. In top to bottom order, they are sewn together, without clipping threads between each row. Then the units of column 3 are stacked, in top to bottom order, and sewn one at a time, onto their corresponding rows on column 2, without clipping the threads between each row. The resulting "web" can then be pressed, and the rows joined without any confusion as to which row goes where.
- Lay out block (except orient your row 2/column 3 unit correctly!!!)
2. Flip column 2 over onto column 1
3. Stitch each row together, without clipping the threads between rows.
4. Open up the rows 1, 2, and 3, and sew column 3 units to column 2, by row, top to bottom, without clipping the threads between the rows.
Now the 3 rows are sewn together, and connected by the unclipped threads, to the other rows
5. Press the seams by row so they will nest with the adjoining row.
6. Sew the rows of the block together. Press how you like, open or to one side.
This "chained row" method is suitable for all the blocks. Do try it...it is easier to do than to explain, I promise!
* * * * * * * * * * * *
Plan the Layout:
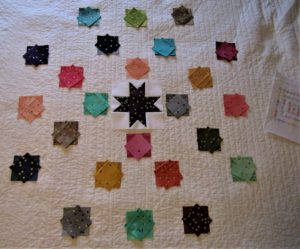
I planned the layout before actually making the Bow Blocks. This was my first time using ombre fabrics, and I did not want to get my pieces mixed up...there are a lot of very similar shades, once the ombre is factored in!
For Ring 1, use 4 of the 5 colors you picked to use twice. Each of these 4, plus the center color, will be used again in Ring 3.
Place 1 color per side, 4 total.
For Ring 2, be sure to include the 5th of the 5 colors you picked to use twice. It will also be used again in Ring 3.
Place 2 colors per side, 8 total.
For Ring 3, include each of the 6 colors you decided to use twice.
Place 3 colors per side, 12 total.
When you arrive at an arrangement that suits you, by all means take a reference photo!
Because no two Ribbon or Corner Blocks have the same two colors, it is important during block construction, to know and keep this order straight!
I arrived at a system that worked for me...if you come up with a better way, by all means use it!
Rather than making all 24 Bow Blocks at the same time, I constructed this top one Ring at a time.
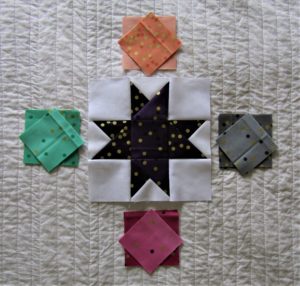
To keep the Rings in order, I always oriented my arrangement with the peach, in Ring 1, at the "top". You may have different colors in your Ring 1. Choose one of them and stick with that throughout the process.
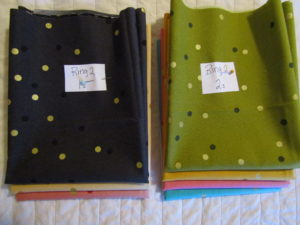
I used a "1-2" method for Ring 2, where, starting at the top left, I counted "1", "2". "1", "2", clockwise around the center. I then stacked all the "1"s, starting with the top 1, in clockwise order, top to bottom. I stacked the corresponding FQs in the same order. I labeled the top FQ in that stack, "Ring 2: 1s". I placed the cut squares, in order, on the FQ stack. Repeat those steps for the "2"s. Label the FQ stack, "Ring 2: 2s". Place the cut pieces, in order, on that stack.
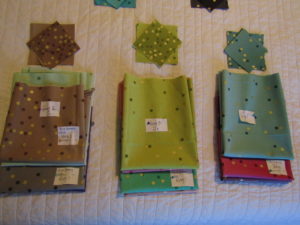
For Ring 3, I used a "1-2-3" method. The labeling is key, for peace of mind as you proceed. I also added a label to each FQ that was used twice, as to where else it was used, so I could easily find it when I needed it for cutting. Label each of the Ring 3 stacks accordingly, "Ring 3: 1s", "Ring 3: 2s", "Ring 3: 3s".
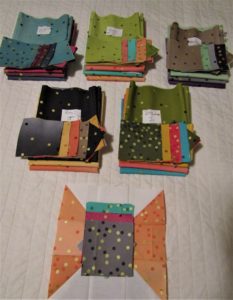
Here are all the stacks, by Ring. Note that I have made the peach Bow Block in this photo, and the remaining Ring 1 pieces remain stacked in clockwise order, top to bottom: gray, pink, green.
* * * * * * * * * * * *
Ring 1 Instructions:
Ring 1 includes 4 Bow Blocks and 4 Corner Block 1.
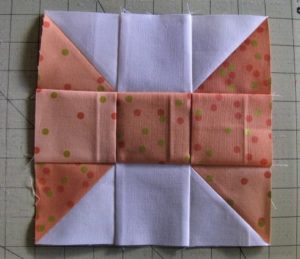
Bow Block Instructions:
- Make 4 HSTs for each block. For each of the 4 colors, take the 2 3 1/2" print squares and pair with 2 3 1/2" white squares. Refer to the HST instructions at the beginning of this post. Tip: Chain piece all 8 pairs of squares, first down one side of the marked line, and then down the other. Snip apart, cut on the marked line, press and trim.
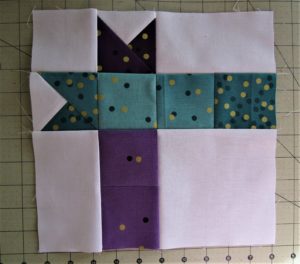
- Layout the Bow Block as pictured, using 3 3" print squares, and 2 3" white squares.
3. Sew the rows together, either one at a time, or using the "chained row" method, described earlier.
Corner Block 1 Instructions:
Cutting: From each of 4 colors, cut 1 4" square, 2 3 1/2" squares, 3 3" squares.
Make 4 QSTs per color. Take the 4 print 4" squares, and pair with 4 white 4" squares. Make into HSTs, trim to 3 1/2". This makes 2 HSTs per color.
Pair each HST with a matching print 3 1/2" square. Refer to the QST instructions outlined earlier. This yields 4 QST units per color. Trim to 3". Set 2 QSTs of each color aside for use in Ring 3. Put them on the stack where they go in Ring 3.
Note: There are 4 Corners, 4 colors. Each color is in 2 corners. "On top" in one corner, "on the bottom" in the other corner. Refer to the diagram and your own color placement as you assemble these blocks.
 The peach "ribbon" is "on top" in the left "Corner Block". It is "on the bottom" in the right "Corner Block".
For each Corner Block 1, assemble using 4 white 3" squares, 2 different color QSTs, 2 print 3" squares to match 1 QST, and 1 print square to match the other QST. Layout and assemble each block according to your color plan.
Center Block, Bow Blocks and Corner Block 1's should all measure 8" x 8", unfinished.
Join the Ring 1 and Center blocks, by sewing the blocks into three rows, and then sewing the rows together.
* * * * * * * * * * * * *
Ring 2 Instructions:
Ring 2 includes 8 Bow Blocks, 4 Corner Block 2, 4 Ribbon Block 2, 4 3"x 23" white strips.
Cutting Instructions, for the prints:
From each Ring 2: 1s print, cut the following: 3 3" squares, 2 1 3/4" squares, 1 4" square, 1 3 1/2" square.
Use the 4" square and the 3 1/2" square to make the QST units. Use only 1 of the 3 1/2" HSTs resulting from the 4" squares. This will make 2 QSTs, of which only 1 will be used.
From each Ring 2: 2s print, cut the following: 4 3" squares, 2 1 3/4" squares, 1 4" square, 1 3 1/2" square. Use the 4" square and the 3 1/2" square to make the QST units.
*Cut 2 3 1/2" squares from the "double" print. Use both 3 1/2" HSTs from the 4" squares. Make all 4 QSTs. The extra QSTs will be used in Ring 3.
Sew the 8 Bow Blocks, following the instructions in the last section.
Corner Block 2 Instructions:
For each Corner Block 2, assemble using: Background: 1 3" square; 2 3" x 5 1/2" rectangles; 1 5 1/2" square. Print: According to your color arrangement, layout and assemble using: 1 QST unit and 3 3" squares from Ring 2: 2s print; 1 QST unit and 2 3" squares from Ring 2:1s print.
Lay out and assemble according to diagram above. 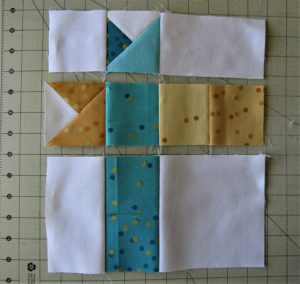
Row 1: 1 white 3" square, 1 Ring 2: 2 QST, 1 white 3" x 5 1/2" rectangle. Row 2: 1 Ring 2:1 QST, 1 Ring 2:2 print 3" square, 2 Ring2:1 print 3" squares. Row 3: 1 white 3" x 5 1/2" rectangle, 2 joined Ring 2:2 print 3" squares, 1 white 5 1/2" square.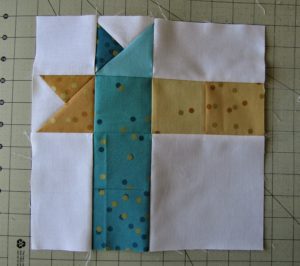
Corner Block 2 should measure 10 1/2" x 10 1/2", unfinished.
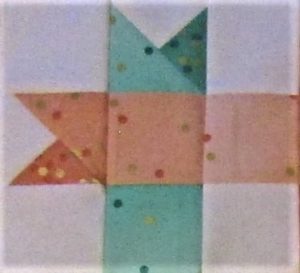
Ribbon Block 2 Instructions:
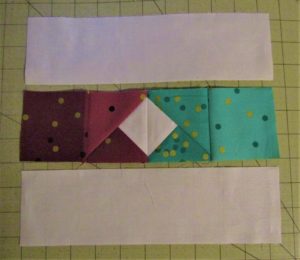
Referring to the Square in a Square instructions at the beginning of this tutorial, and according to your color arrangement, make 4 SiaS units.
Sew a matching 3" print square to each side of the SiaS unit.
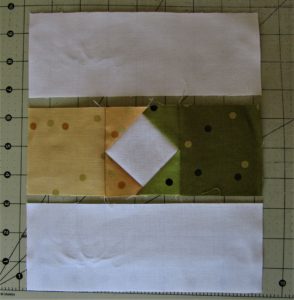
Pin and sew 2 white 3" x 8" rectangles, 1 to each side of the print row.
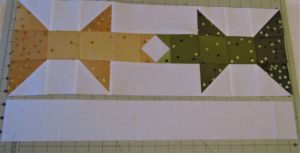
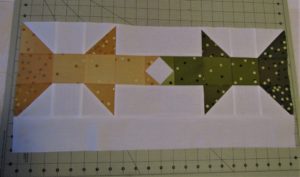
Make 4 Ribbon Block 2. They should measure 8" x 8", unfinished. Assemble Ring 2: For each side of Ring 2, join 1 Bow Block(1) to 1 Ribbon Block 2 to 1 Bow Block(2). Each assembled unit should measure 8" x 23". From your stack of 3" x WOF strips, pull 4, and cut 4 3" x 23 strips. Set the unused sections of the strips aside, for use in the outer border. Pin and sew to the inside edge (towards Ring 1) of the pieced block unit.
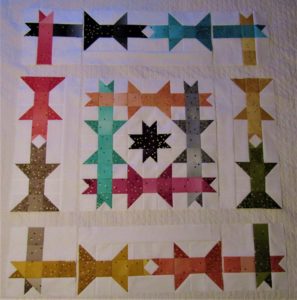
Layout and assemble Ring 2 with the Ring 1/Center unit, according to the photo below and your own color arrangement.
- Row 1: Join 1 Corner Block 2, to a Bow/Ribbon Block unit, to 1 Corner Block 2. Press seams to one side.
- Row 2: Join a Bow/Ribbon Block unit, to the Ring 1/Center unit, to another Bow/Ribbon Block unit. Press seams to the other side from Row 1.
- Row 3: Join 1 Corner Block 2, to a Bow/Ribbon Block unit, to 1 Corner Block 2. Press seams to same side as Row 1.
- Pin liberally and join rows together.
This unit should now measure 43" x 43".
*Note: This would make a very good baby quilt size, as is.
* * * * * * * * * * * *
Ring 3 Instructions:
Ring 3 includes 12 Bow Blocks, 4 Corner Block 2, 8 Ribbon Block 3, 4 white 3" x 43" strips
Cutting Instructions, for the prints:
From each Ring 3: 1's, 2's, and 3's prints, cut the following: 1 4" square, 1 3 1/2" square, yield 2 QSTs. Do not cut these from the "double" prints if you have already made the extra QSTs from earlier steps.
From each Ring 3: 1's print, also cut 4 3" squares.
From each Ring 3: 2's print, also cut 2 3" squares.
From each Ring 3: 3's print, also cut 3 3" squares.
Sew 12 Bow Blocks. It may be helpful to sew them in the 1-2-3 sets of four, to keep them organized in 1-2-3 order.
Lay out all the Bow Blocks in order for reference while making the Corner and Ribbon Blocks for Ring 3.
Make QSTs. Either "by stack", or all at the same time, make the remaining QST units, by first making HSTs with the white/print 4" squares, trim to 3 1/2". Set one HST aside. Pair 1 HST with 3 1/2" print square. Trim to 3".
Sew 4 Corner Block 2s.
For each Corner Block 2, assemble using: Background: 1 3" square; 2 3" x 5 1/2" rectangles; 1 5 1/2" square. Print: According to your color arrangement, layout and assemble using: 1 QST unit and 3 3" squares from Ring 3: 1s print; 1 QST unit and 2 3" squares from Ring 3: 3s print.
Row 1: 1 white 3" square, 1 Ring 3:3 QST, 1 white 3" x 5 1/2" rectangle.
Row 2: 1 Ring 3:1 QST, 3 Ring 3:1 print 3" squares.
Row 3: 1 white 3" x 5 1/2" rectangle, 2 joined Ring 3:3 print 3" squares, 1 white 5 1/2" square.
Corner Block 2 should measure 10 1/2" x 10 1/2", unfinished.
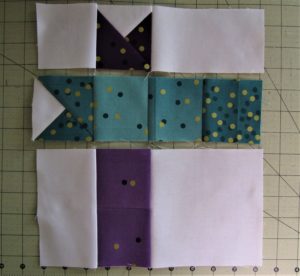
Ribbon Block 3 Instructions:
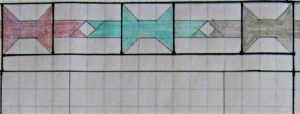
Sew 1 print 3" square to coordinating print QST. Repeat. Join as shown.
Sew 1 white 3"x 10 1/2" strip to the top and bottom of the print row. Make 8 Ribbon Block 3s, according to your color arrangement. Each Ribbon Block 3 should measure 8" x 10 1/2", unfinished.
For each side in Ring 3, join a Bow 1 to a ribbon block, to a Bow 2, to a ribbon Block, to a Bow 3. Each side should measure 8" x 43", before adding the 3" strip to the bottom of each side.
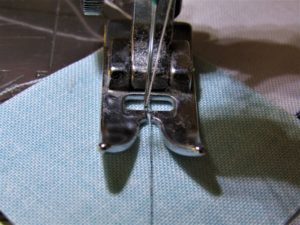
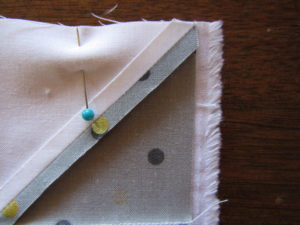
Since the strip is 43" long, there are 2 options. Option 1: Take 4 strips 3" x WOF. Finger press center on both the strip of white and the side unit. Match and pin at the center, and work your way out, pinning, to each end. Trim the slightest bit of selvedge off the ends. There will be some selvedge remaining in the seam allowance, as shown in the photo below.
If you are not willing or comfortable with leaving any selvedge in the seam allowance, there is option 2. Option 2: Using 1 3" x WOF strip and a 3" scrap from previous cutting, sew together and trim to equal 43". Repeat for remaining 3 sides. Whichever option you choose, sew the white 3" x 43" strip to each side unit.
Sew 2 Corner Block 2s to the top and bottom Bow/Ribbon Block units.
Sew the left and right sides of Ring 3 to the assembled top. Sew the top and bottom of Ring 3 to the assembled top. The assembled quilt top should measure approximately 63 1/2" x 63 1/2".
* * * * * * * * * * * *
Add Borders:
There should be 6 remaining white 3" x WOF strips, plus the trimmings from the strips in Ring 2. For each side (not top and bottom) of the assembled top, take 2 trimmings from Ring 2 strips, approximately 19", and sew one to each end of 1 3" x WOF strip. Measure the side of the top, and trim to size, approximately 63 1/2", centering the full WOF strip. and trimming from each end. Finger press to find the center of the sides of the assembled top, and the 2 pieced strips. Match and pin liberally. Sew the 2 pieced strips to the sides of the quilt top. For the top and bottom of the quilt top, sew the remaining 3" x WOF strips together in 2 pairs, end to end. Measure the top and bottom of the assembled quilt top, and trim the strips to size, approximately 68 1/2". Sew the 2 remaining pieced strips to the top and bottom of the quilt top. Your Ribbons and Bows quilt top is now ready to baste and quilt according to your preferred method.
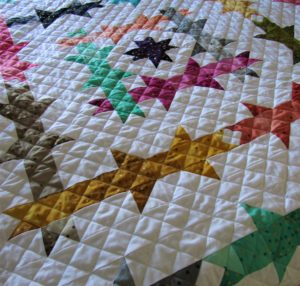
For this project, I used the 108" wide Grunge Hits the Spot in Pool, for the backing, and quilted it using straight lines in a simple diagonal grid.
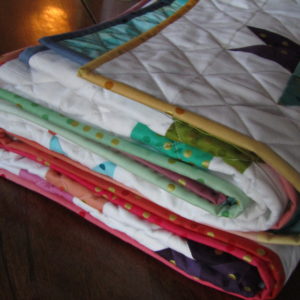
For a colorful, scrappy binding, 15 strips of 2 1/4" x 21" are required. Cut the strips from the long side of the fat quarters. Cut 2 strips from 7 fabrics, plus 1 more strip, for a total of 15 strips. For a cohesive look, sew each pair of strips with their dark ends together. Then connect the pairs, pale end to pale end, in the color order that pleases you, along with the last odd strip. Finish binding according to your preferred method.
This quilt finishes at 68" x 68".
I hope you find this quilt easier to make than it was to write these instructions! Please share any quilts or accessories you make using this recipe! On Instagram tag me, @cedarforksarah, and @modabakeshop, and use the hashtag #ribbonsandbowsquilt. You may also email me directly with any questions or to share what you have made at [email protected]. To see more about what I am busy sewing, please visit my blog, Cedar Fork Stitches. Thanks so much, and happy sewing!
Sarah Zimmerman





 top
top bottom
Comments