Welcome to Moda Fabrics!
Tip Jar: Sewing with coated fabric...
Tip Jar: Sewing with coated fabric...
I do love a good, simple tote bag - preferably one that won't get stained and can withstand a little rain. And of course it has to be pretty.
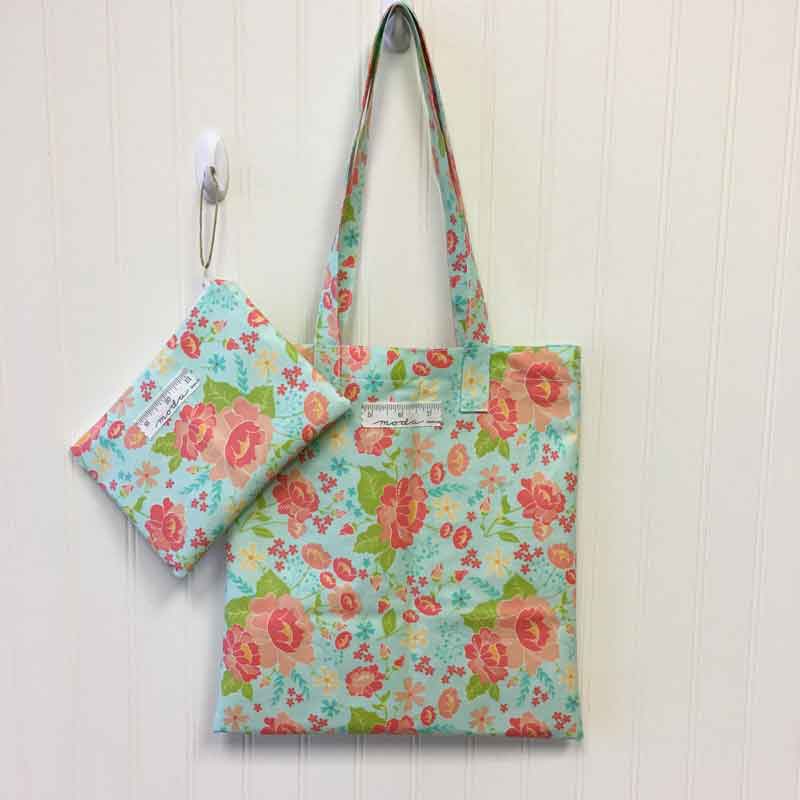
So when I saw that four of our Spring collections would have coated fabrics, I was completely on board.
With one obvious hitch... I hadn't sewn on this kind of fabric in years and I wasn't sure if I remembered some of the tricks. A bit of practice, some experimenting, and a little research helped make this a whole lot of fun. It's not hard, though it can be a tiny bit messy... more on that in a moment.
First - what do I mean by "coated" fabric? Take a woven, printed cotton fabric and add a thin PVC layer to it, making it water-resistant and very durable. It's perfect for bags, tablecloths and mats and even a simple rain jacket. While it isn't suitable for children's clothing, it can be used for children's book bags, lunch bags and toy bags.
Cutting. Cutting the coated fabrics just takes a rotary cutter and ruler. I start by folding the fabric - wrong side out. I prefer cutting with the coated side on the inside because the two coated layers won't slide when laid against each other. The wrong side sometimes does - at least that's been my experience.
To make the bags shown above, you'll need 5/8 yard of 45" wide coated fabric.
Fold the fabric in half, aligning the selvages. Make a straightening cut on one side, then cut a strip that is 14" wide by the 45" width of the fabric. From that piece, trim the selvage and cut two rectangles - 14" x 16". Save the piece on the fold for now. Then cut 2 strips - 2 1/2" x 45" wof. Trim the strips to measure 2 1/2" x 27" - these are the straps/handles.
For a diagram of the cutting - Coated Cotton Tote Bag Cutting.
Sewing. The first thing to know about sewing with coated fabrics is that professionals use a special presser foot - one that is Teflon coated or made for sewing with plastic or coated fabrics. The coating on the fabric likes to stick to our regular metal or plastic presser feet; truth be told, it also likes to stick to the throat plate on the base of the sewing machine, which is why a Teflon coated foot never seemed to work all that well for me. The other drawback to them is that the Teflon presser feet can be expensive. Fortunately, there are alternatives.
No. 1 - Tissue paper. Wrapping tissue or the thin tissue used for sewing patterns is layered between the fabric and the presser foot/throat plate. Advantage - it does work. Disadvantage - the tissue slides and then has to be removed from the stitches.
No. 2 - Baby powder. I wrote that it might get messy. The advantage is that it works, it's budget-friendly and your sewing room will smell baby-fresh. The disadvantage is that it will make a bit of a mess, but it's easily cleaned up. If you're worried about what it might do to your sewing machine, I can tell you that after making four tote bags and a couple of zipper bags, there wasn't any obvious powder residue in the base of my sewing machine.
Pins. Put them away. Clips - like Wonder Clips - work best, though paperclips will work in a pinch. Glue pens - like my favorites from Sewline - can help but really, clips worked best for me.
Pressing. This coated fabric can be pressed on the wrong side with a slightly warm iron only. Anything hotter than that will change the way the fabric feels - ask me how I know. (I did write that I was experimenting...)
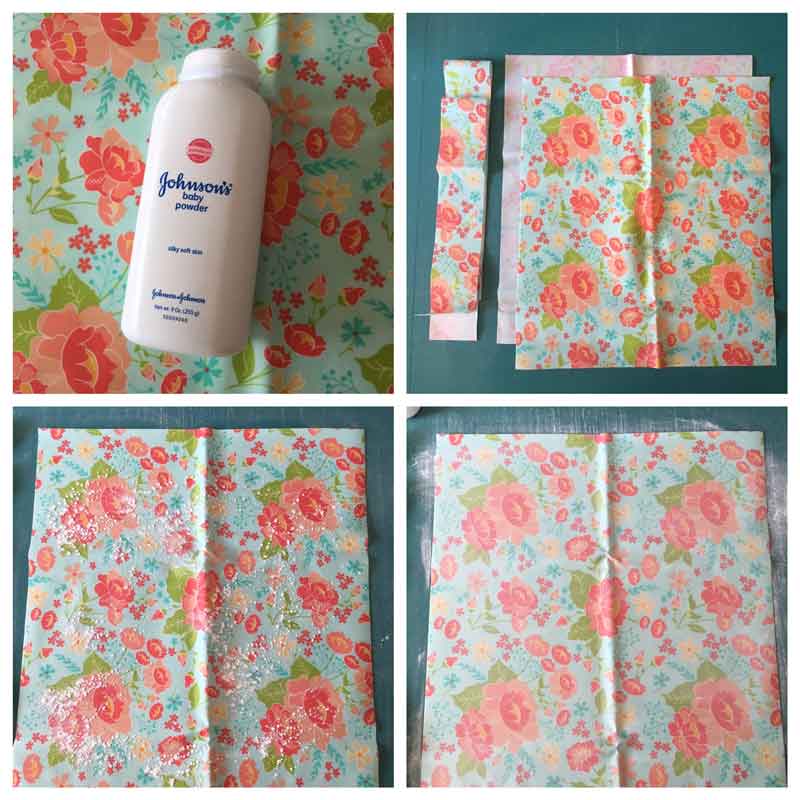
Have you ever floured a surface before rolling out pie or cookie dough? If you have, you'll know what to do here. Lightly sprinkle the baby powder on the coated surface and then use your fingers to cover the entire surface. Shake off the excess. Do both rectangles - and the straps.
Thread. While regular 50 wt. thread will work, I found that the stitching looked best with a thicker thread, especially the top-stitching. I used a 28 wt. Aurifil on the top and a 40 wt. Aurifil in the bobbin. While the 28 wt. works beautifully in the bobbin, using the 40 wt. meant that I didn't have to do much to adjust the tension. I also changed my needle to a 90/14. If all you have is 50 wt., it does work but the thread essentially disappears.
Stitch length. I lengthened my stitch length to 8 to 10 stitches per inch. The seams on the inside of the bag can be stitched with a slightly shorter length - 10 to 12 stitches per inch - but the top-stitching looked best at the longer length.
Stitching itself... Even with the powder, the coated fabric isn't going to feed itself under the needle with the same ease that your regular cotton quilting fabrics do. I found that I needed to keep my hands on the fabric and "help" keep it moving smoothly - especially over seams.
Assembling the bag. With the powdered, coated sides of the 14" x 16" rectangles together, stitch a 1/2" seam allowance around three sides - leaving a 14" wide open. This will be the top of the bag.
Fold down 1 1/2" on the top opening of the bag and secure with large clips - I used Jumbo Wonder Clips - or large paperclips. Top-stitch the folded edge of the bag first - 1/8" away from the fold.
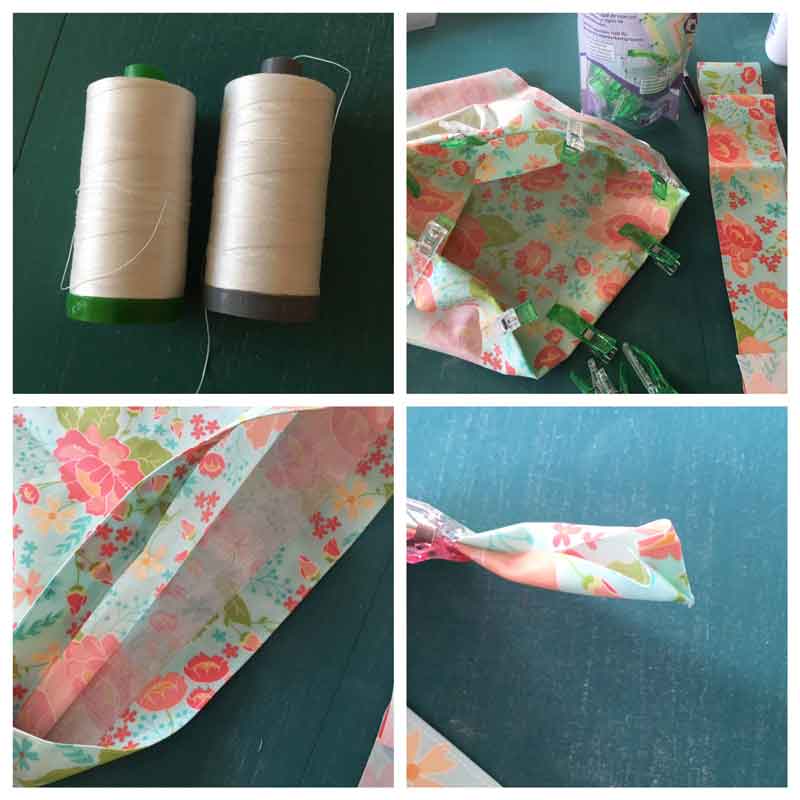
Then fold under the bottom edge to complete the hem and use the clips to hold the edge in place while stitching. I stitched from the top side with my seam allowance marked with a piece of tape - it was a 1" hem.
For the straps, fold the 2 1/2" x 27" length in half and top-stitch 1/8" from the fold - turn the two ends under 1/4" before stitching.
Then fold the two edges inside approx. 1/4" and secure with a clip - I used these Wonder Clips - or a paperclip. Making a tube and turning it right side out did not work for me - not for a finished width of 1". Top-stitch the two folded edges as close to the edge as possible. Because it can't be pinned, glued or fused, keeping the two folded edges perfectly matched up can be a challenge.
Placement of the straps on the outside of the bag - the bottom edge of the strap is 2" from the top edge of the bag - and 2" from the center. I matched the two seams to find the center of each side of the bag and measured from the fold. To make it secure, I borrowed the stitching pattern from a similar style tote I own. I also double-stitched the top - as they had done.
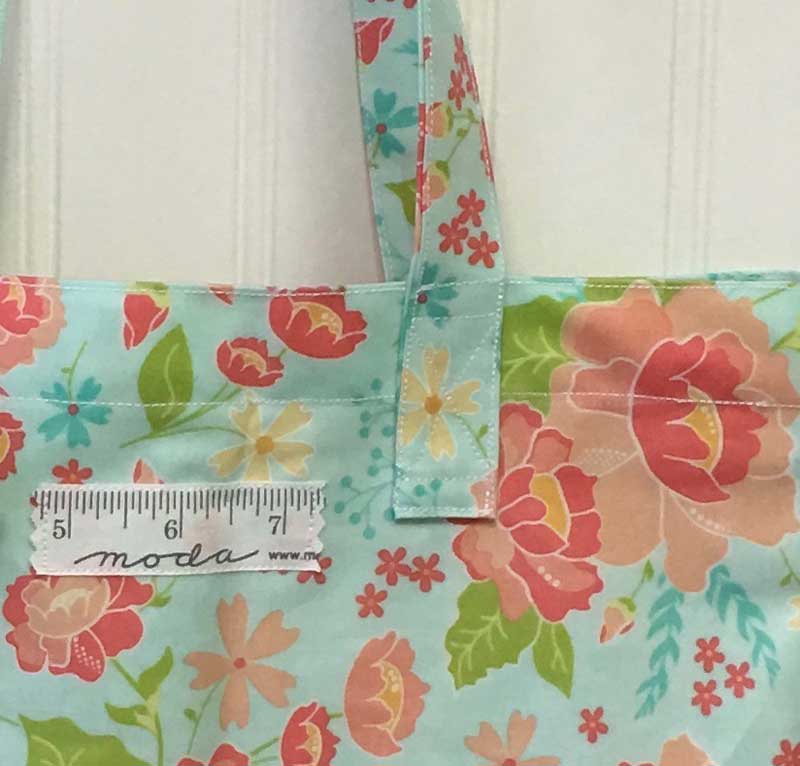
Wouldn't you know, the only photo I have with a close-up is probably the messiest of the sixteen strap-attachments I did. Of course, I think it also shows why I preferred using the 28 wt. thread for the stitching that would show. The tag? That's just a piece of Moda measuring tape from a pre-cut - pinked and top-stitched on the outside of the bag.
When I finished, my friends asked if I would sew with this coated fabric again and my answer is "absolutely!" I like playing with different projects and trying new techniques, they're all "tools for the toolbox", in that something I learned doing this will likely come in useful for something else. And I know I will use these bags - though one of two have already been claimed by others. I also have a grocery-shopping bag cut out, waiting to be assembled.
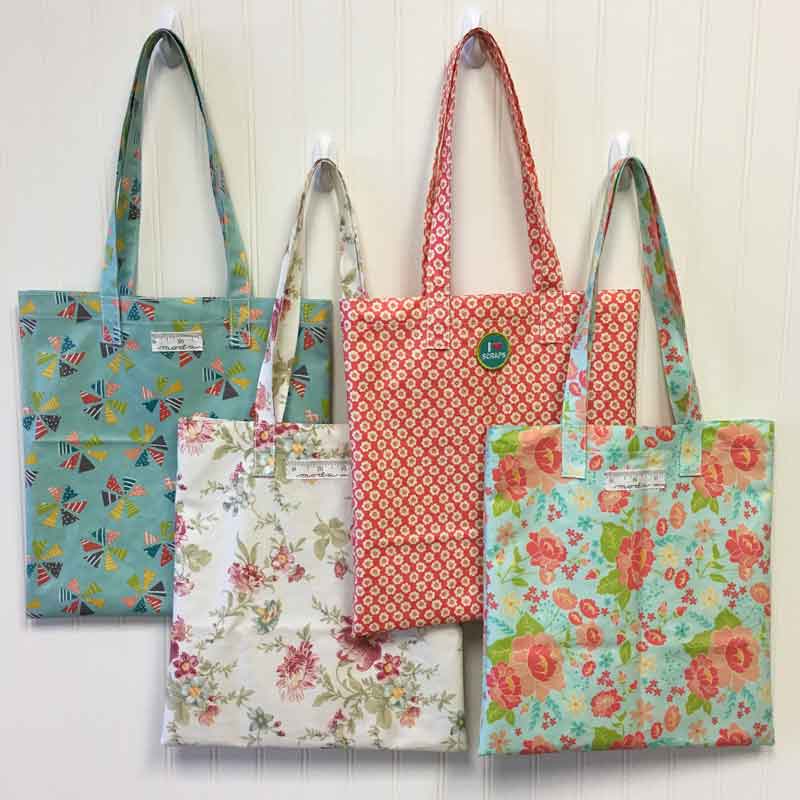
From left to right, the collections with coated fabrics are:
- Mixed Bag 2017 by Studio M
- Poetry by 3 Sisters
- Coney Island by Fig Tree & Co.
- Lulu Lane by Corey Yoder
So there you have it - sewing with coated fabrics. You needed a new project to play with this weekend, didn't you?
Happy Friday!

Comments